7 Best Tips on How to Knit a Toy with 4 Ply Yarn

Time:2026-11-13 Author:Ethan
0%

A small knitted toy can look simple, yet its shape depends on steady tension, secure seams, and carefully chosen stuffing. Four-ply yarn is a useful starting point for miniature animals and dolls, but the term does not guarantee identical thickness across brands or countries. Before casting on, compare the yarn label with your pattern and knit a small swatch. A few minutes here can prevent a rabbit with one oversized ear.

The Craft Yarn Council’s yarn-weight standards pair yarn categories with suggested needle sizes and stitch gauges. Its Fine category, for example, lists roughly 27–32 stitches over four inches in stockinette stitch. That is a useful reference, not a substitute for your yarn label: “4 ply” can describe different weights in different markets. For how to knit a toy with 4 ply yarn, this distinction matters. A tighter fabric helps keep stuffing from showing through, while overly tight stitches can make small limbs stiff and difficult to sew.

The seven tips ahead focus on practical choices: matching needles to your tension, shaping features with simple increases and decreases, and joining parts with durable seams. You will also find guidance on stuffing evenly and checking the toy as you work. Even experienced knitters sometimes misjudge a head’s proportions; pause, compare both sides, and adjust before fastening off. Small corrections count. These methods cannot make every toy perfect, and that is part of the craft. A slightly uneven smile may give a handmade bear more character than a flawless one.
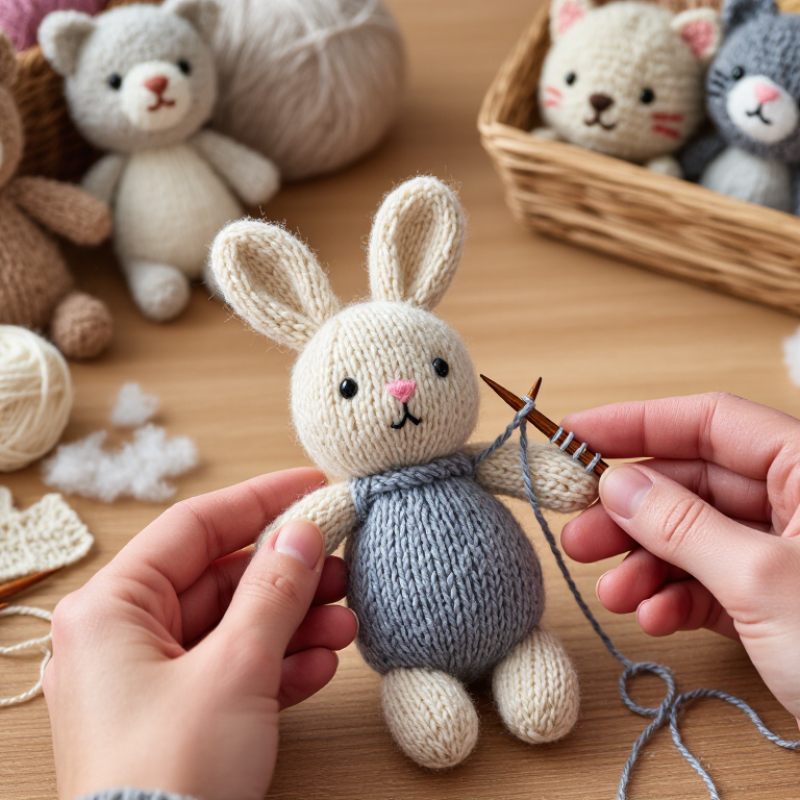
7 Best Tips on How to Knit a Toy with 4 Ply Yarn

Choose a Toy Pattern Suited to 4 Ply Yarn

Choose a pattern written for fingering or super-fine yarn, rather than relying on “4 ply” alone. Ply names vary by country and do not always guarantee the same thickness. The Craft Yarn Council’s Standard Yarn Weight System gives a useful comparison: its super-fine category typically knits at 27–32 stitches per 4 inches, with 2.25–3.25 mm needles. Check your yarn’s label, then compare its gauge with the pattern. A small swatch helps. It can feel like extra work, but skipping it may leave a toy much larger than expected.

Look for a pattern with clear shaping and limited tiny pieces. A round-bodied animal or simple ball often suits fine yarn better than a toy covered in narrow limbs and delicate decorations. For example, check whether the pattern’s head, body, and ears can be knitted firmly enough to hold their shape. Use the recommended needle size as a starting point, not a rule; your stitches may be looser or tighter. Small details matter. I would also question patterns that give no finished measurements or gauge, because estimating toy size from a photo is unreliable. A quick test piece can reveal whether the fabric looks dense and even before you knit the whole toy.

7 Best Tips on How to Knit a Toy with 4 Ply Yarn

Choose a Toy Pattern Suited to 4 Ply Yarn

4-ply (fingering) yarn is commonly knitted with 2.25–3.25 mm needles. Choose a toy pattern written for fine yarn, and check its stated gauge: the pattern’s gauge and your fabric are more useful than yarn weight alone when selecting needles.

Gather Yarn, Needles, and Essential Knitting Tools

Choose smooth 4 ply yarn that feels soft but holds its shape. Check the yarn label before buying; “4 ply” can vary between regions and yarn makers. For a small toy, one main colour and a little contrast yarn are often enough. A palm-sized ball can still run short if the design includes clothing or long limbs, so keep a spare skein from the same dye lot when possible.

Match your needles to the pattern, not just the yarn label. Many 4 ply toy patterns use needles around 2.75 to 3.25 mm, but your knitting tension matters. Knit a small swatch and look for gaps. Stuffing should not peek through. A snug fabric is useful. Too tight, though, and the stitches may strain as you shape the toy.

Set out sharp scissors, a blunt tapestry needle, stitch markers, and a row counter. Keep a small amount of washable stuffing nearby, and check its care instructions against the yarn. For toys meant for young children, embroidered eyes are usually safer than small attached pieces. I once skipped markers on a rounded head and had to recount several rows. It worked out, but I would mark the shaping points next time. A little preparation helps.

Knit a Gauge Swatch and Adjust Your Needle Size

With 4-ply yarn, a small gauge swatch can prevent a toy from turning out larger or looser than expected. Cast on enough stitches to make a square at least 12 cm wide, using the same stitch pattern planned for the toy. If you will knit the body in the round, make a small circular swatch too; many knitters’ tension changes when they stop purling.

Wash and dry the swatch as you intend to care for the finished toy, following the yarn’s care instructions. Then measure stitches across the center, not near the curling edges. Count over 10 cm and compare your result with the pattern gauge. A ruler helps. So does good light.

If you have more stitches than the pattern specifies, your stitches are too small; try a larger needle. If you have fewer, test a smaller one. Change by a quarter or half a millimeter, then knit another swatch. For a stuffed toy, fabric should feel firm, with no obvious gaps where filling could show. Still, don’t force the needle so small that your hands ache or the fabric becomes stiff.

I once skipped the second swatch and regretted it: the head was neat, but the body felt oddly floppy. A little extra testing is less exciting than starting the toy, but it can save a lot of unpicking.

Shape the Toy with Careful Increases and Decreases

When shaping a knitted toy, treat each increase and decrease as part of its silhouette. With 4-ply yarn, check the ball-band gauge before casting on; “4-ply” can describe different yarn weights in different markets. The Craft Yarn Council’s Standard Yarn Weight System gives category 1 super-fine yarn a gauge of 27–32 stitches per 4 inches, using US 1–3 needles as a guide. Your yarn may behave differently. Swatch it.

Place a marker at the round’s beginning and keep a written count of shaping rounds. For a wider head, add evenly spaced increases; for a rounded crown, work paired decreases at regular intervals. If you add six stitches in one round, record where they fall. Then pause. Matching decrease directions can create tidy seams, while consistent spacing keeps the toy from leaning. Avoid pulling stitches too tightly, which can make the fabric stiff and distort the stuffing.

Shape limbs in small stages, checking their length against each other before closing. Add stuffing gradually and inspect the toy from the front and side; filling can change its outline. A slight wobble is not always a failure, but it may reveal uneven spacing. I would revisit the stitch counts before blaming the yarn.

Seam, Stuff, and Finish the Toy Safely

Before sewing, lay the knitted pieces flat and check that their edges match. A small mismatch is easier to fix now than after stuffing. Use a blunt yarn needle and mattress stitch, taking each stitch through the edge bars rather than splitting the fabric. Keep the seam firm but not tight; puckering can distort the toy. Leave a short opening for filling. Check it by gently tugging the joined edges. No gaps should appear.

Add clean, suitable toy stuffing in small tufts, pushing it into narrow areas with the needle’s blunt end. Stop before the fabric stretches or the toy feels hard. A little less stuffing often looks better. Close the opening with neat, even stitches, then weave the yarn tail through several inside stitches and trim it close. For toys meant for very young children, embroider the face instead of attaching small parts. It takes longer. Inspect every seam and feature, and repair loose stitches before use. Follow care instructions for both yarn and filling, and let the toy dry fully after washing. I sometimes miss a loose tail on the first check, so turn the toy in good light and look again.

FAQS

How do I choose a pattern for 4-ply yarn?

Look for a pattern designed for fingering or super-fine yarn. Compare its gauge with your yarn label, since “4-ply” can mean different thicknesses.

Why should I knit a gauge swatch?

A swatch helps predict the toy’s size and fabric density. Skipping it can leave the finished body larger or looser than expected.

How large should my gauge swatch be?

Make a square at least 12 cm wide, using the stitch pattern planned for the toy. Measure across its center, away from curled edges.

Should I make a circular swatch for a knitted-in-the-round toy?

Yes, if the body is knitted in the round. Your tension may change when you stop purling, so a small circular test can be useful.

How do I adjust my needle size after measuring the swatch?

If you have more stitches than the pattern gauge, try a larger needle. If you have fewer, try a smaller one. Change by a quarter or half millimeter.

What should the fabric feel like for a stuffed toy?

It should feel firm, with no obvious gaps where stuffing can show. But avoid needles so small that your hands ache or the fabric turns stiff.

Which toy shapes work well with fine yarn?

Round bodies and simple balls often suit fine yarn. They usually have fewer narrow limbs and tiny decorations to shape.

How can I keep the toy’s shaping even?

Mark the beginning of each round and write down shaping counts. Check both limbs against each other before closing them. I sometimes rush this part.

Conclusion

Learning how to knit a toy with 4 ply yarn begins with choosing a pattern designed for fine yarn, so the finished toy has clear shaping and a suitable size. Gather the yarn, appropriately sized needles, stitch markers, a yarn needle, and stuffing before you begin. Knit a small gauge swatch and compare it with the pattern’s guidance; if your stitches are too loose or tight, adjust your needle size to create an even fabric with no gaps.

Follow the pattern carefully when making increases and decreases, since these shape the toy’s body, head, and limbs. Keep track of your stitches and check that matching pieces are consistent. Once the knitting is complete, seam the pieces securely, add small amounts of stuffing evenly, and close each opening firmly. Finish by weaving in loose ends and checking that seams and details are secure, especially if the toy is intended for a young child.

Ethan

Ethan

Ethan is a seasoned marketing professional with a deep expertise in our company's innovative product line. With a passion for sharing knowledge and insights, he takes the lead in regularly updating our corporate blog, where he explores industry trends, product features, and effective marketing......